By default, your status page is published under the domain webgazer.io with a URL like www.webgazer.io/s?id=1. However, it is a little unrealistic to expect your customers to memorize this URL. That is why we recommend setting a custom domain or a subdomain (status.mycompany.com or mycompanystatus.com). When you configure your status page to use a custom domain, WebGazer serves your status page on that domain with an SSL certificate automatically.
There are few steps you need to complete to make your status page published with a custom domain:
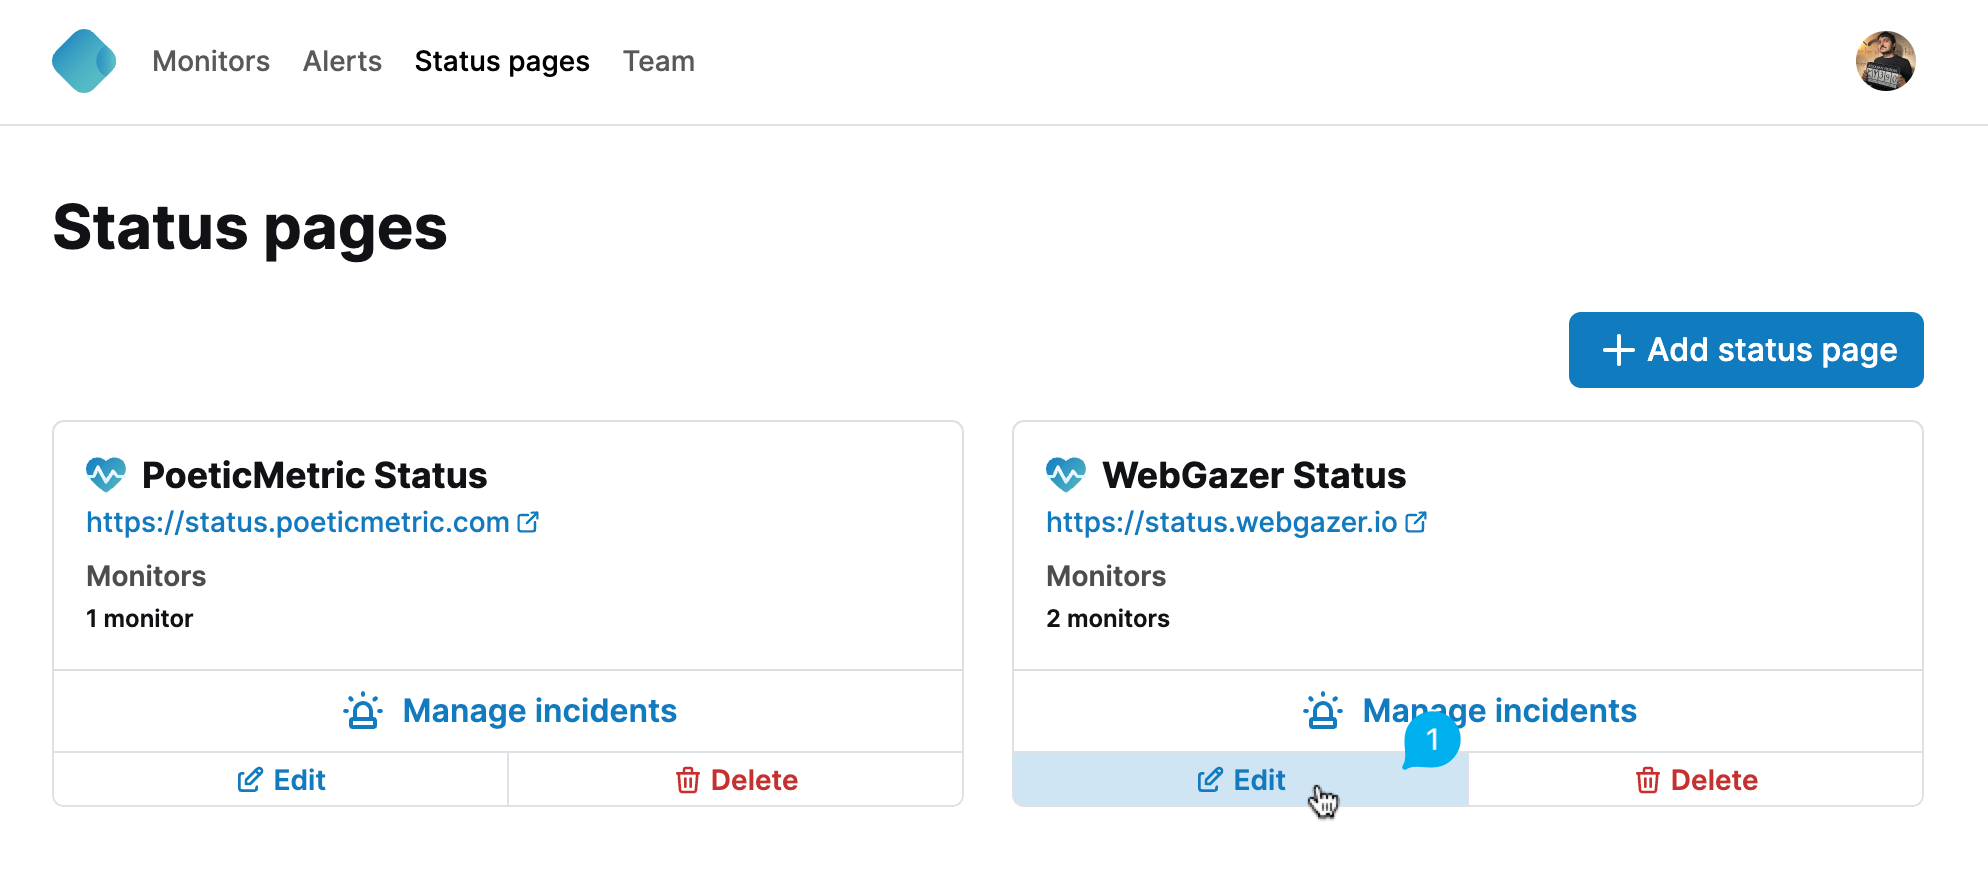
Update the domain in your status page's settings. Go to the Status pages section, and click the Edit button for the status page you want to configure.

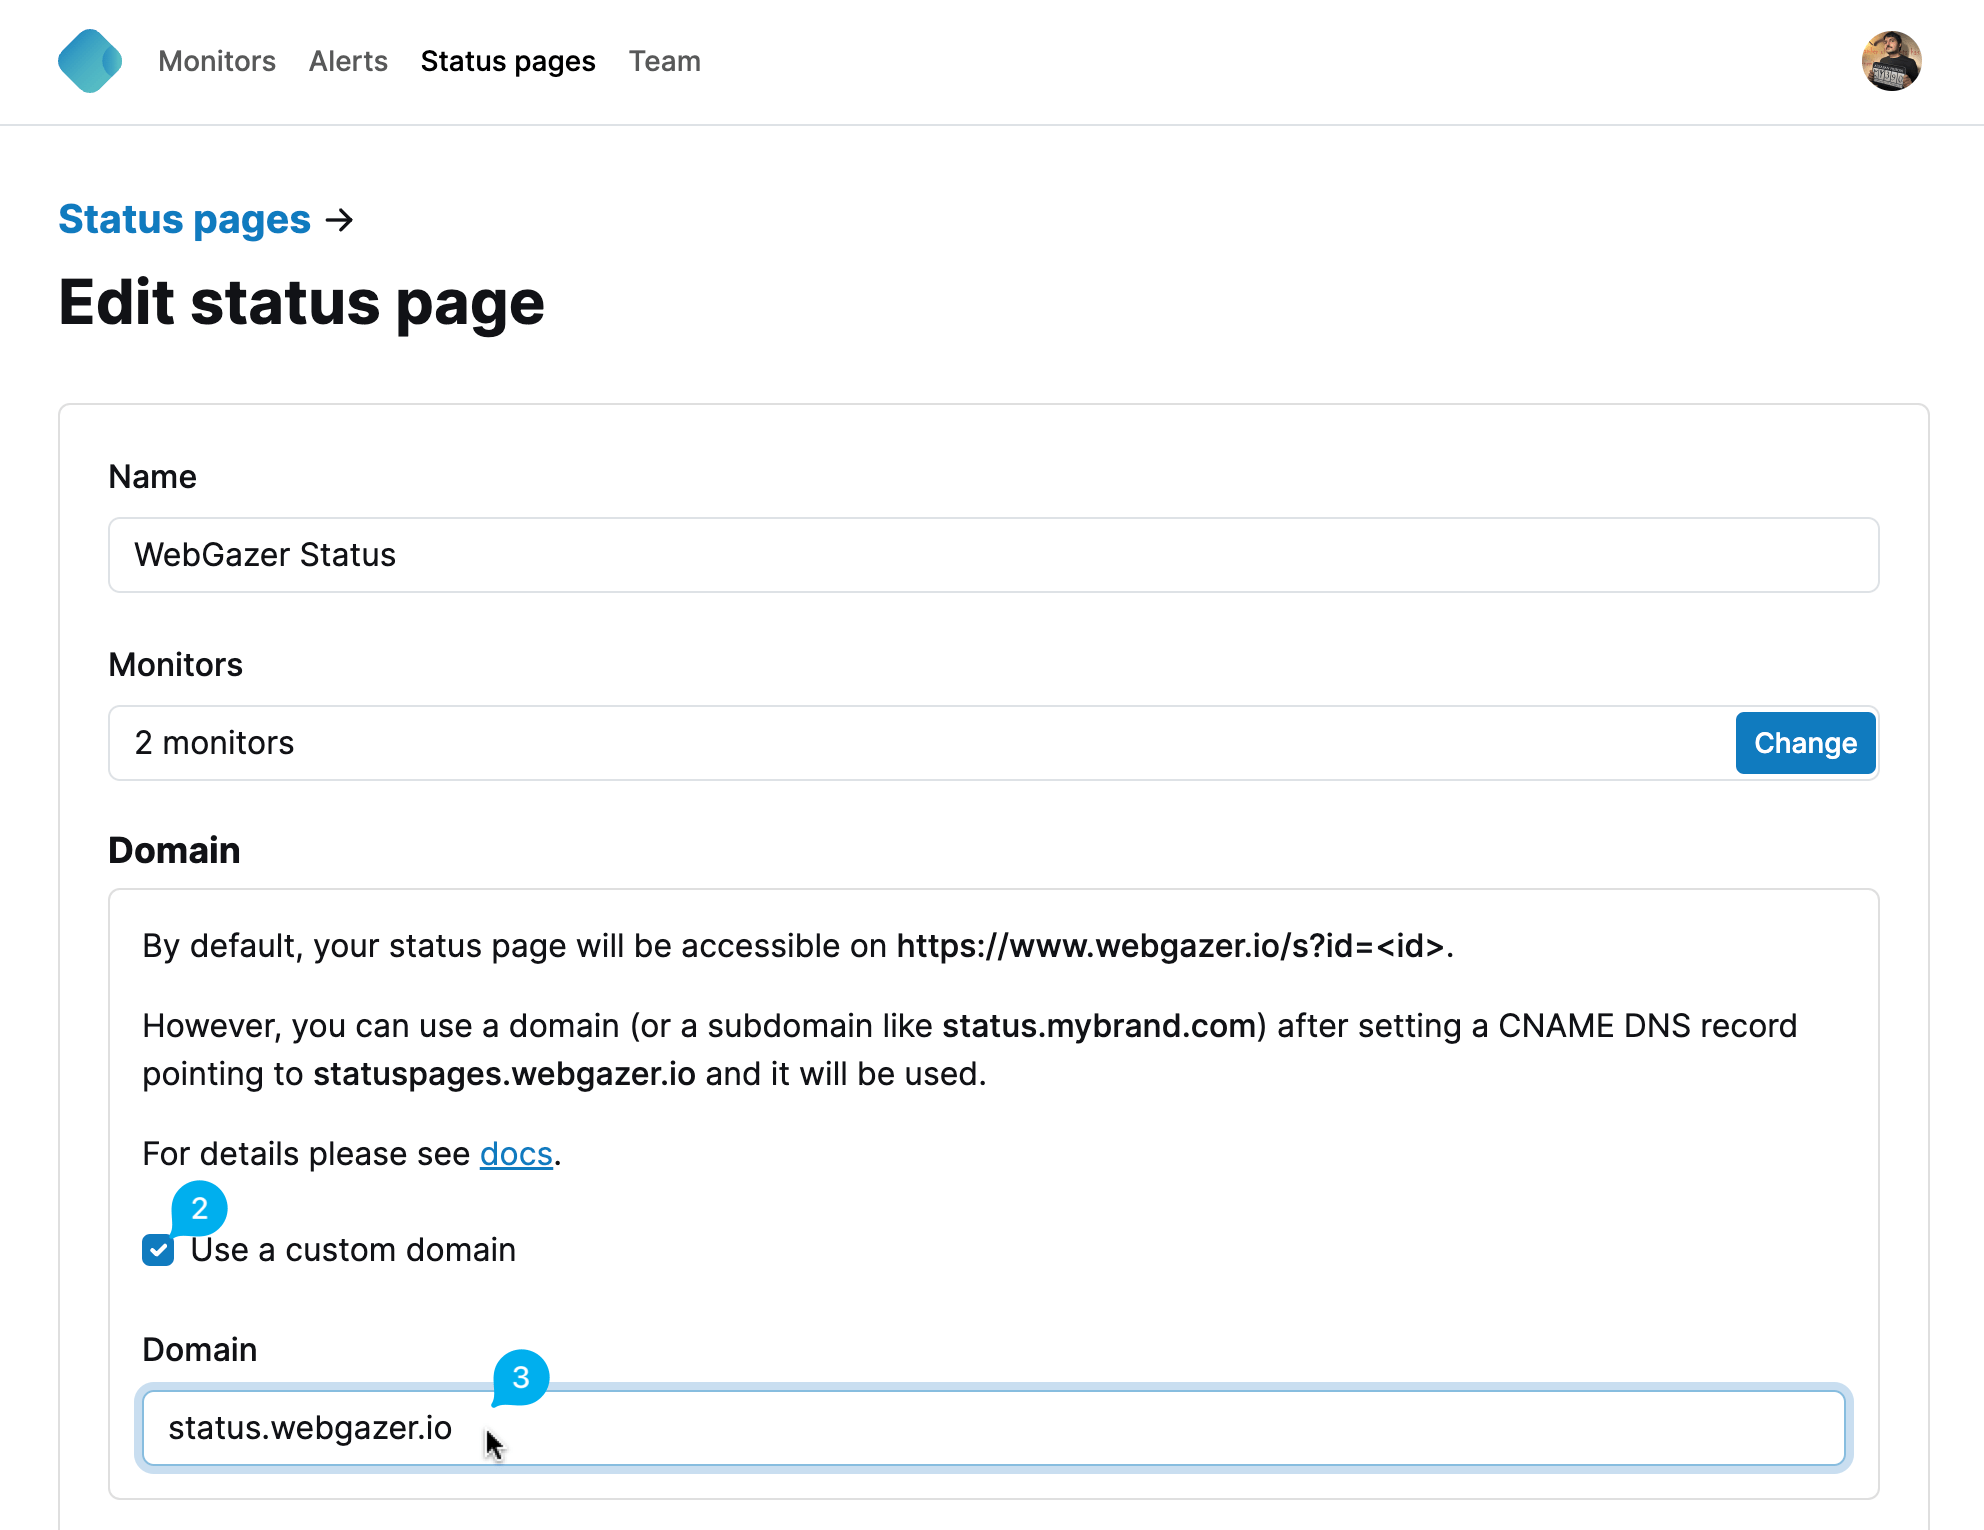
Make sure the checkbox with label Use a custom domain is checked, and type in the domain or subdomain you would like to use.

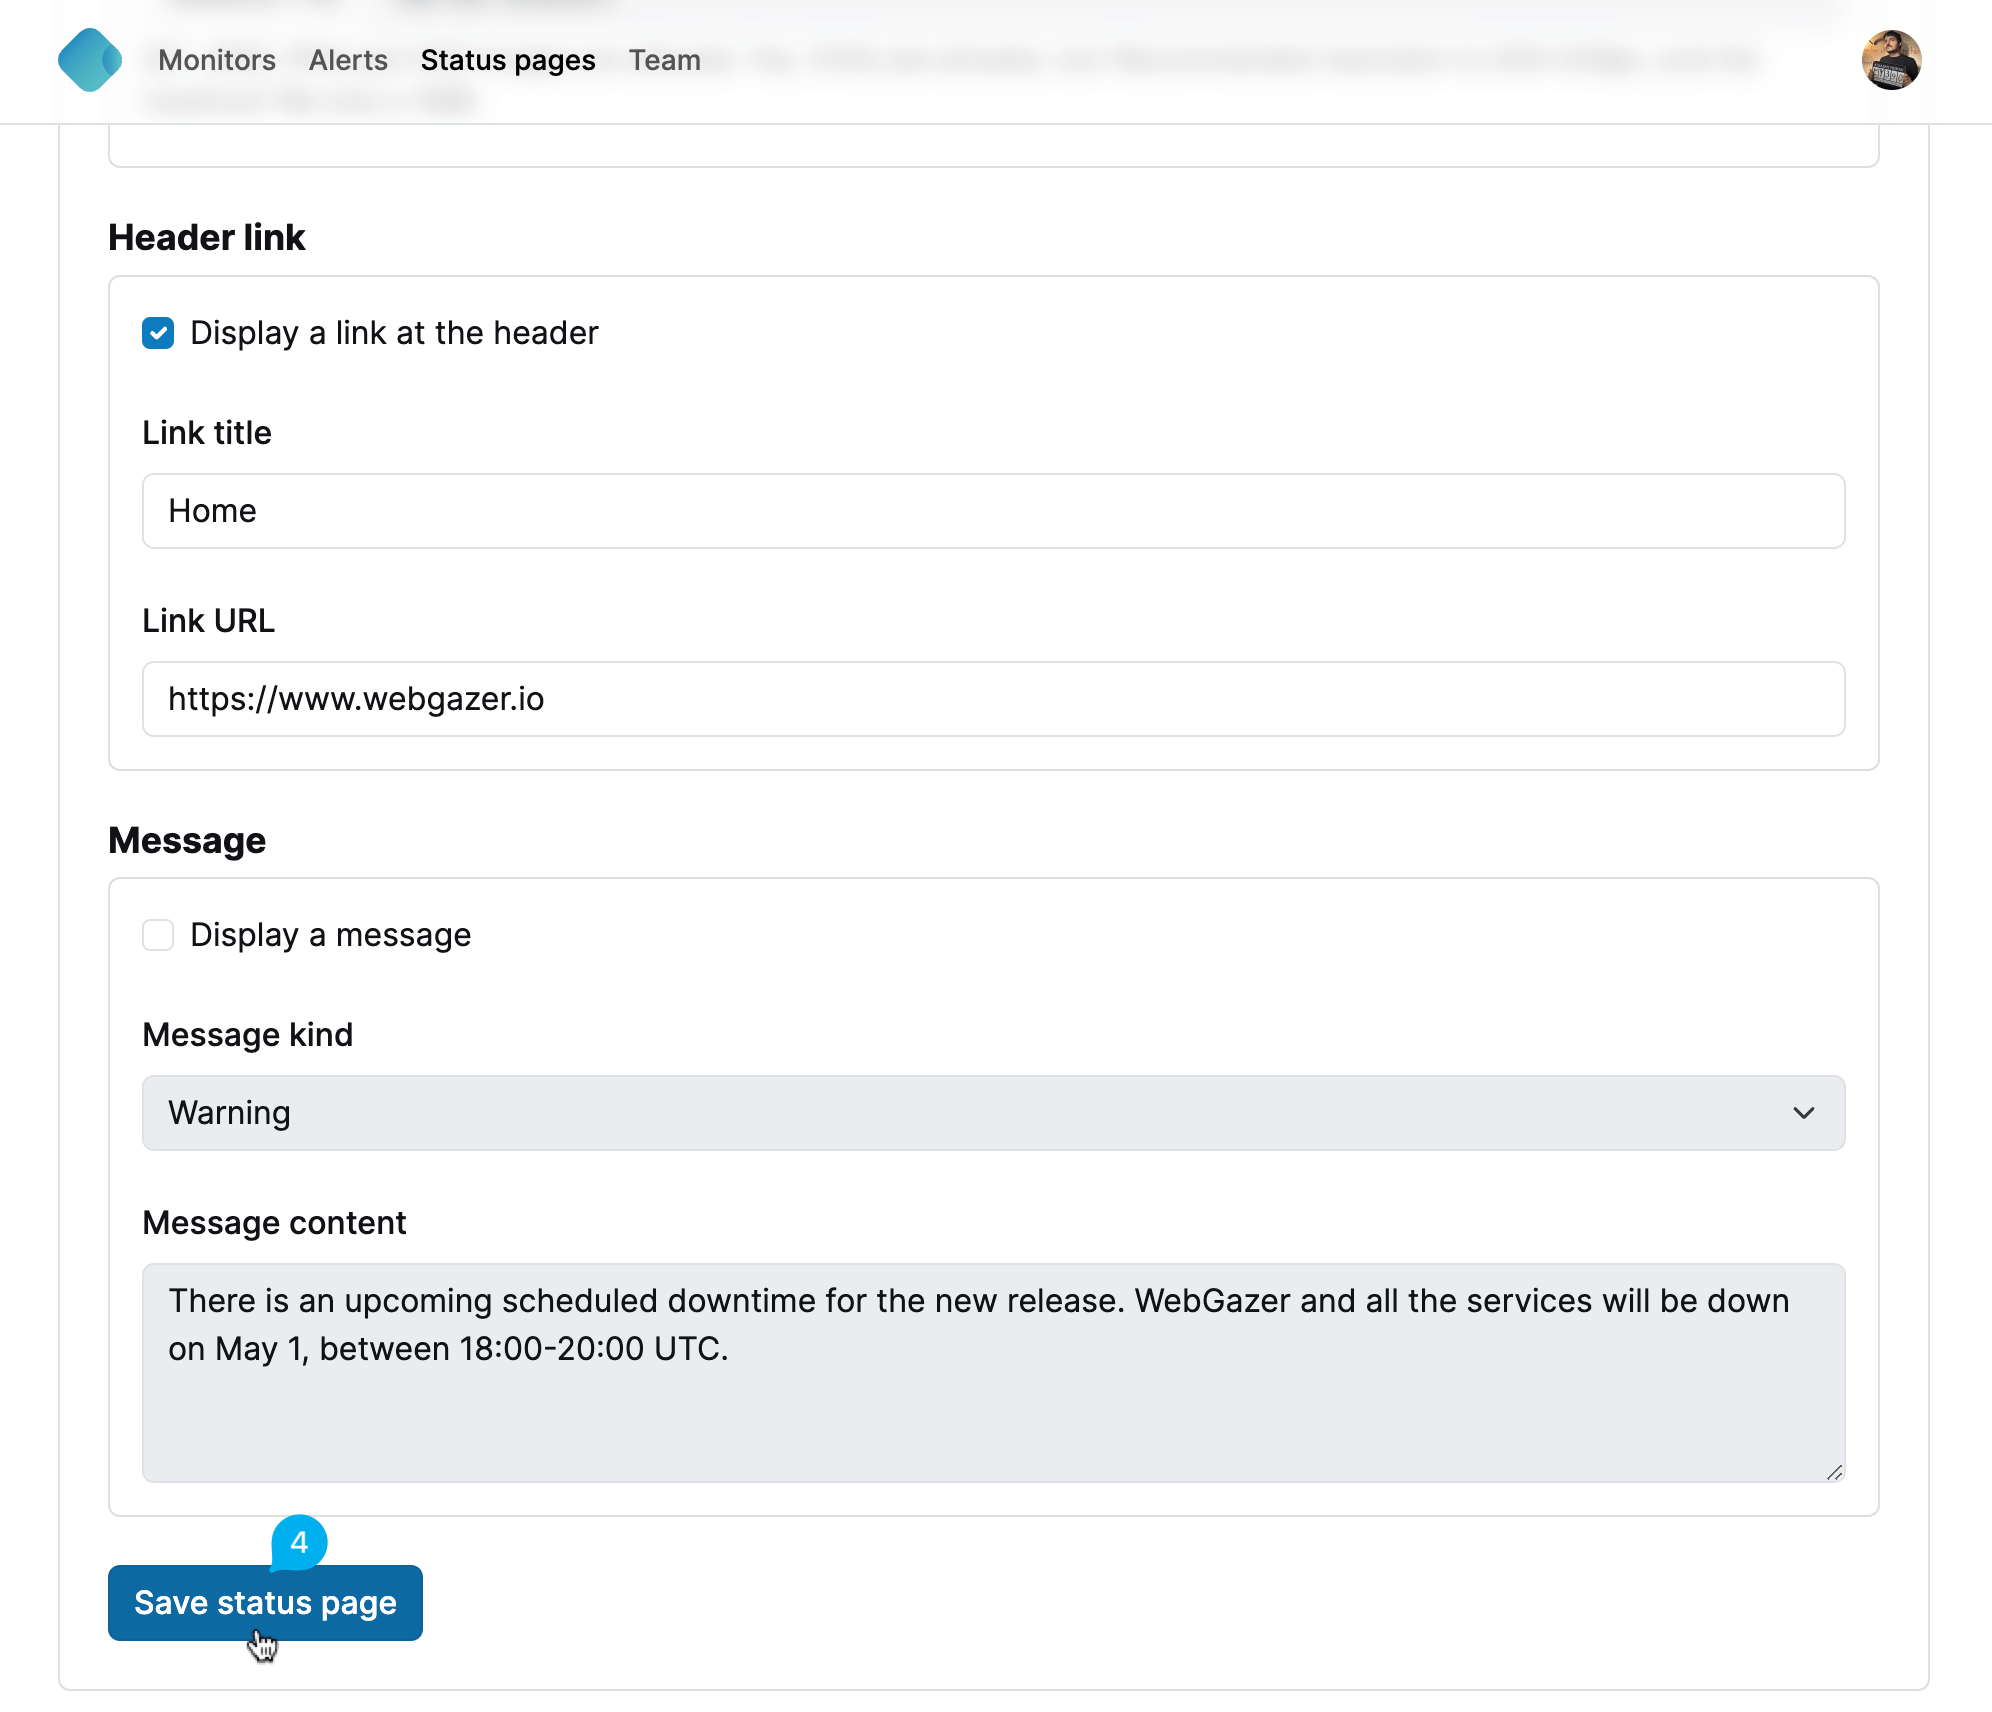
Scroll down, and click the Save status page button.

The only remaining step is to update the DNS for the selected domain or subdomain. Go to your DNS service provider, and add a CNAME record for the domain or subdomain you selected with the value
statuspages.webgazer.io.This step might be different for different DNS service providers. You can consult to your DNS service provider's docs about adding a CNAME record, or contact support for further help.